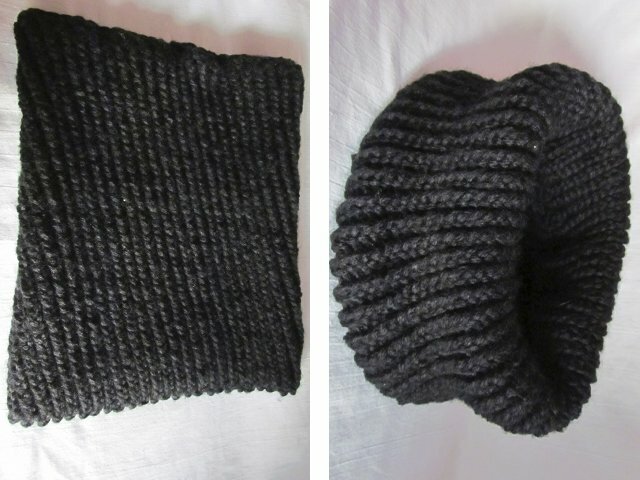
Snood is a beautiful and warm knitted scarf with connected edges. This so-called pipe can be of various sizes, densities, volumes and is made using a variety of patterns: from simple elastic bands to incredibly difficult braids and weaves. A closed scarf, also called a collar, can be dense and warm, and can be openwork and airy, depending on what season it is chosen for.
The scheme of knitting snud elastic
Snoods have been very popular for several cold seasons in a row, and not in vain, because they look harmonious with almost all clothing styles, great for women, men and children, and picking up a beautiful color and interesting yarn in texture, snood alone will work as the most important emphasis on the whole image. That is why it is worth knitting this simple, but very useful accessory with knitting needles. We will consider in this article several ways of knitting a yoke, including for beginner knitters. To knit snood with knitting needles for beginners, schemes with a description will be very useful.
The gum pattern is universal when knitting a wide variety of products, but it looks especially good on closed things. In addition, the great advantage of this pattern is its ease of execution and versatility: a snood-tie knitted with an elastic band is suitable for both women and men. Therefore, novice masters should turn to this particular method of knitting. In this case, we will talk about knitting with circular knitting needles, which are so convenient to knit clamps.
Materials for work:
- 1 pair of circular knitting needles;
- thick threads (composition to your taste: wool, wool mixture, acrylic);
- Crochet hook;
- scissors.
Working process:
Take the knitting needles and dial the loops. In total, we need 98 loops. If you want to make snood wider, dial more loops, the main thing is that there should be an even number of them.
After you have scored all the loops, you should remove one of the knitting needles.
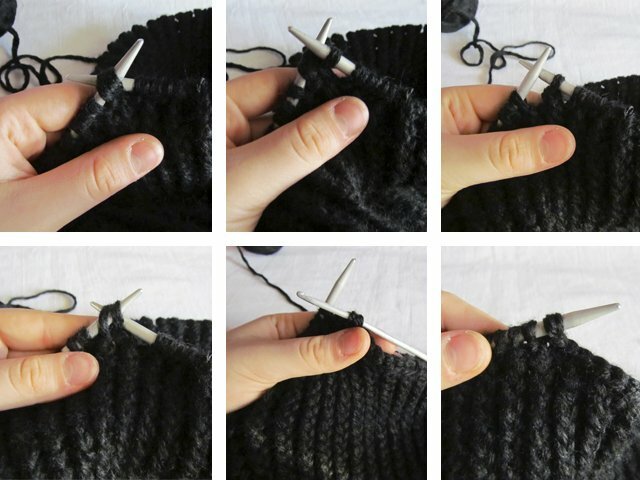
The first (edge) loop is removed.
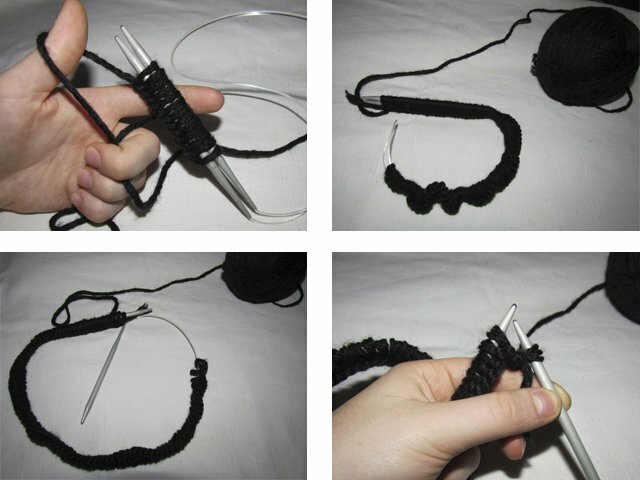
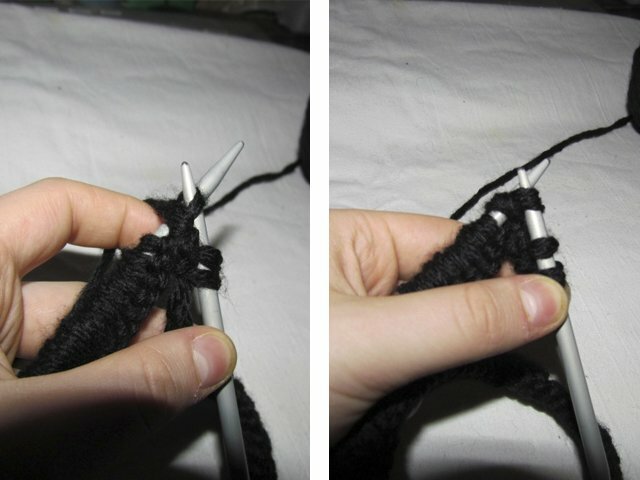
Getting to the knitting process. Please note that in the left hand we will have a knitting needle on which the loops are located, and in the right hand - a knitting needle on which we will wear knitted loops. So, remove the first chain on the right knitting needle. We pry the next loop behind the front wall from left to right, grab the working thread and pull it together with the knitting needle into the loop on the left knitting needle. Transfer the loop to the right knitting needle.
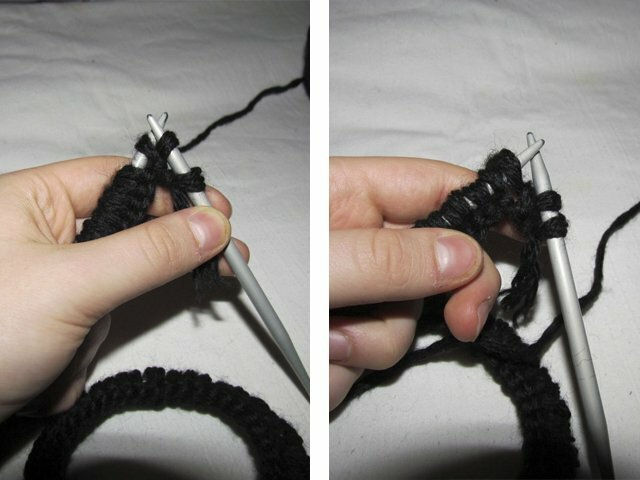
The next loop we will have is the wrong one: leave the working thread in front of the knitting needle (on the left side), insert the right knitting needle from right to left on the left knitting needle under its front wall, put the right knitting needle on the working thread. After that, we pull the knitting needle with the working thread into the loop on the left knitting needle by reverse movement.
We continue to alternate the loops: front, back, etc.
We will knit in a circle, so we do not need to turn the knitting. Carefully watch that the loops do not twist, since we do not have a picture yet, so that the loops can twist.
The width of the product will be about 30 cm. If you want to calculate the width individually, you can use the following formula: neck height * 2 + 5 cm.
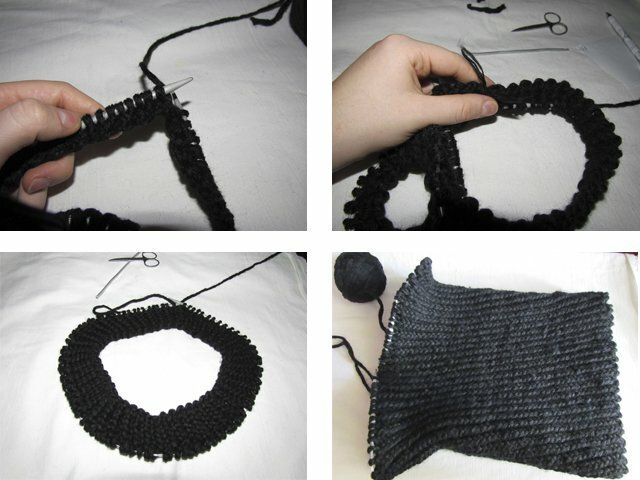
After the product reaches the required width, you need to close the loop. To do this, we knit 2 loops of the front, remove them, and then throw back on the left knitting needle.
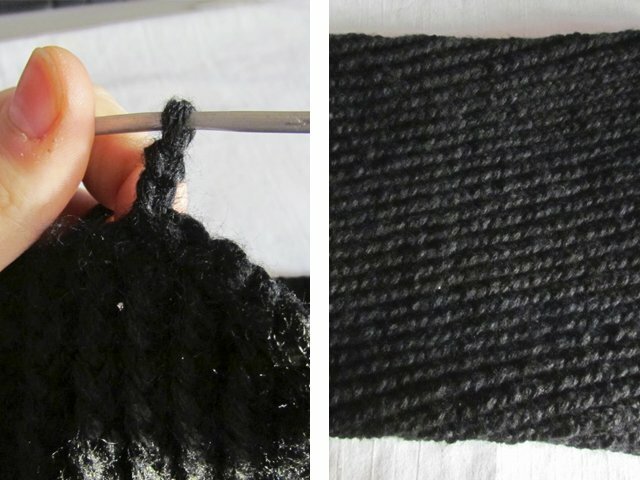
If your knitting is too tight, you can use a hook as an auxiliary tool.
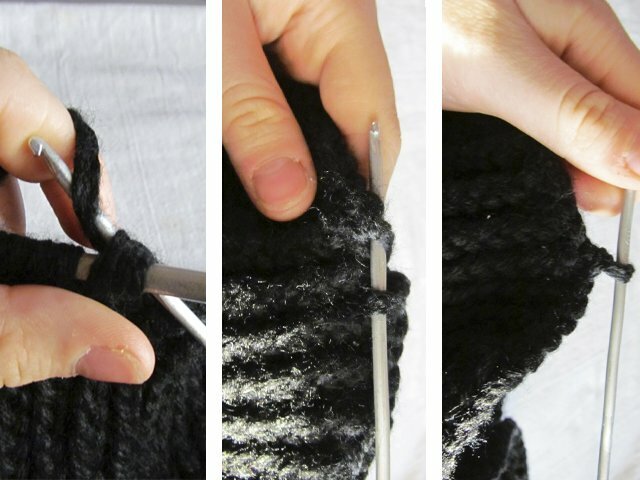
When there are only 2 loops left, we close the row, knit with a crochet column using a hook. Snood with an elastic band is ready. You can wrap it inward or double it.