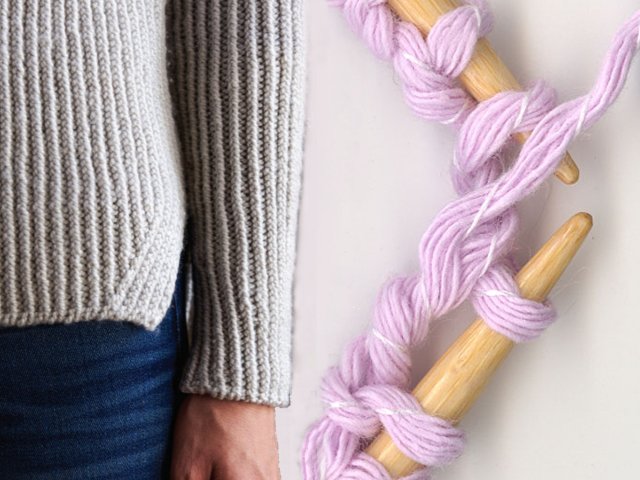
The Italian way of knitting loops with knitting needles is perfect for cuffs and lower straps in elastic, which retain their elasticity after many washes and frequent wearing of a knitted product. Keeping fit perfectly is not the only quality of the product associated with this way of looping. The result of the Italian set with knitting needles is very beautiful, it is often confused with a perfect-looking machine knit.
The pattern with the Italian set of buttonhole stitches is smooth and elastic. Professionals offer several methods for such knitting, which are perfect for both beginners and experienced knitters, who definitely will not be bored in the process.
Italian knitting stitch set - master class
What is the peculiarity of the Italian way of knitting stitches? First of all, there are several ways of knitting loops with the Italian set, which allow you to get different options for patterns, and at the same time offer a different degree of difficulty:
- Italian set of loops with auxiliary thread;
- Italian set of loops without auxiliary thread.
Knitting loops with an auxiliary thread is considered more complicated and interesting - here three knitting needles are used, and an additional thread (or gum thread) of a contrasting color, while knitting with an Italian set without an auxiliary thread is faster and more convenient - you only need one knitting needle and one thread. The choice is yours.
If you choose knitting in the Italian way, with or without additional thread, you can get a rounded neat elastic edge, which is often knitted in the form of 1 × 1 elastic, double elastic and 2 × 2 elastic.
An important rule to follow with the Italian method of knitting stitches: the first five rows should be knitted on a full-length thinner than the main fabric of the gum.
With elastic edge

The Italian way of knitting stitches on knitting needles is really ideal for the elastic edges of the cuff, neck or bottom of knitted items, such as sweaters, jumpers, hats. It retains its original shape for a long time and is convenient for circular knitting.
Consider the method that helps to get the most elastic edge - Italian way of looping with auxiliary thread. You can call the final result with a rubber band 1 × 1.
For this method, we prepare the yarn of the main color and the auxiliary thread of a contrasting color. We will knit loops on two knitting needles.

Working process:
Using a contrasting thread, we draw half of the desired number of loops on the knitting needles. This thread will not be needed anymore, therefore it can be cut so as not to interfere with further work. Next, we will knit with the thread of the main color.
First row knit with facial loops. The edge loop also knit, you do not need to remove it. This applies exclusively to the first row. In the future, the edge loops are removed, as usual - without knitting.
Second row - purl loops.
Third row - facial loops.
Knit turn to work on fourth near. Edge to remove. The next loop is the wrong one. Then lift the loop from the broach of the 1st row, put it on the left knitting needle and knit the front one.The next loop is again seamy (it already exists on the spoke). Lift the loop again from the broach of the 1st row and knit it with the front one. And so on.
Thus, you need to alternate: purl stitches from purl, and facial - from broaches. It is convenient to raise the hinges with a hook or an additional knitting needle.
The number of loops will double and reach the required estimated number. It looks like knitting at the end of the fourth row.
Fifth row knit as the loops lie, i.e., purl the sewing on the seamy, and the facial - on the front. Formed gum 1x1.
Knit the following rows with an elastic band 1x1 to obtain the desired height.
Auxiliary thread to dissolve and pull out of knitting. She is no longer needed.
Beautiful cruciform

A cross-shaped set of stitches with knitting needles is perfect for finishing the edges of a knitted product. A denser edge made with cross-shaped loops perfectly shapes the thing. This method, also called the “Bulgarian Conception”, requires a special set of loops.
Knitting pattern and progress:

To complete this set of loops, we fold the thread coming from the ball three times, while the length of the triple thread should be approximately three times greater than the width of the part. We put the thread on the fingers of the left hand, the triple thread from the ball hangs from the thumb, and the thread coming from the ball - from the index. Put the knitting needles together into the loop, as shown in photo 1.
Press the threads with the index finger of the right hand to the knitting needles and form the first loop, capturing the triple thread from the outside of the thumb of the left hand (photo 2 and 3).
We form the second loop, capturing the triple thread from the inside of the thumb of the left hand. To do this, the position of the triple loop on the thumb of the left hand needs to be changed: fold the thread and immediately pick it up from the opposite side of the finger (photo 4).
Gathering loops alternately from the outside and from the inside of the thumb of the left hand (which is why the method is called cruciform), we get a series of loops that are located on pairs of needles. A cross-shaped stacked row on the front side is shown in photo 5.
Then each loop of the pair is knitted face or wrong depending on the pattern with which the product will be made.
For gum 2x2

The Italian set of loops with knitting needles for a 2x2 elastic band begins to be knitted like a 1 × 1 elastic band, supplementing later with several important manipulations.
For this set of loops, you need 1 pair of knitting needles with the number that the elastic will knit. Form the first loop on the spoke. Position the working thread on the index finger and the end of the thread on the thumb of the left hand. A knitting needle with a loop is located in the middle.
Working process:

Insert a knitting needle under the thread on the thumb, and then grab the thread from under it, on the index finger. Pull the knitting needle toward you, a loop has formed on the knitting needle, resembling a facial loop.
Move the knitting needle away from you and down under the thread going to the index finger and grab the thread going from under it to the thumb. A loop was formed, resembling the wrong side.
Repeat steps 2 and 3 until you reach the desired number of loops. The penultimate dialed loop should look like the wrong one. To fix the dialed loops, dial the last loop, as in the usual set. For 1x1 gum, dial an even number of loops; for 2x2 gum, dial the number of loops multiple of 4 plus 2 hem.
We knit the first row with a hollow elastic band. We remove the edge, and we knit the next loop with the front for the back wall. We remove the back loop following it without knitting, the working thread passes before work. Repeat until the end of the row. The last, edge loop is knitted front for the front wall.
We knit the second row of hollow elastic. At the same time, the front ones fit into the front wall, and the wrong ones are removed without tying, the thread before work.
Next, we knit the elastic with the same number of knitting needles.For gum 1x1 we knit, as the loops look: over the front - the front loops, over the wrong - the inside loops.
For 2x2 gum, we knit the first row as follows. After the hem we knit the first facial loop.
We change the next wrong loop and the subsequent facial loop. And then we knit the front loop of the front.
We knit further 2 reverse loops standing nearby. And then we knit 1 front loop of the front.
Repeat steps 9 and 10 until the end of the row. At the end of the row we knit 2 purl and hem.
To make the description of knitting an Italian set of knitting needles easier, in the video tutorial below this method of knitting is shown more clearly.
Video tutorial for beginners
A lot of videos with knitting master classes help facilitate the understanding of knitting stitches in the Italian way. For example, this method of knitting will become much clearer if you watch such a video lesson.
Video "Italian knitting stitch set":


